How it works
The workflow is built around a simple rule: check the file first, spend credits only when a fix is needed, then download the prepared output with evidence attached.
Artwork preparation
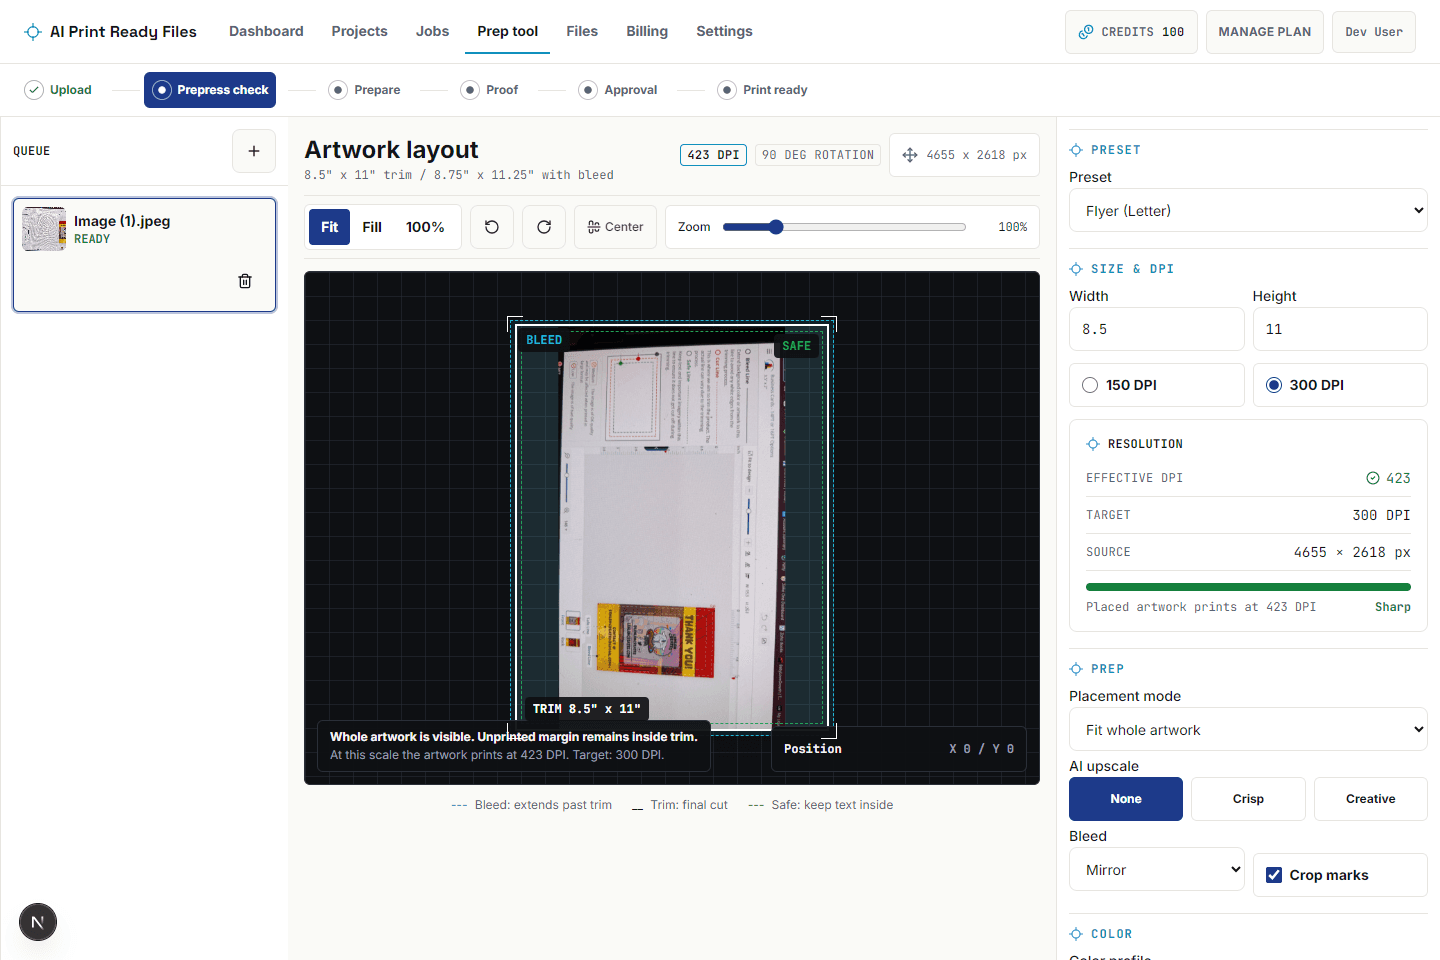
Make production decisions on the actual file.
Final size, effective DPI, bleed, crop, color, and output stay visible in one workbench.
- 1
Scan before you spend credits
Upload an image or PDF and run a free preflight scan. The report checks size, effective DPI, bleed, transparency, file structure, and plain-English risk notes.
- 2
Choose the print target
Pick final size, DPI target, bleed, fit, crop marks, color handling, and export format so the tool can judge the file against the job you actually need.
- 3
Review only the fixes the file needs
Add AI upscale, vectorization, background removal, or generative bleed only when the report and credit quote show the operation is useful.
- 4
Download the prepared file and verification report
Keep the finished PDF, PNG, TIFF, or SVG together with the report so a printer or production teammate can see what was checked and changed.